
Background information
My own NAS system – Part 4: searching for the right hardware
by Richard Müller

For part five in this series of articles, I’m finally breathing life into my DIY NAS: time to install the operating system. Mind you, this still involves quite a few complications.
I’m getting ever closer to finalising my DIY NAS: time to set up the Unraid server. I need a USB stick to install the operating system. Especially when it comes to USB sticks and Unraid, it’s worth paying attention to a few points.
Lime Technology, the company behind Unraid, has linked the licence for its operating system to USB sticks, i.e. to a Globally Unique Identifier (GUID). That’s the unique serial number of every USB stick.
But be careful, not every USB flash drive has a GUID. For this reason, I chose the Verbatim Nano, as it has a unique identification number.
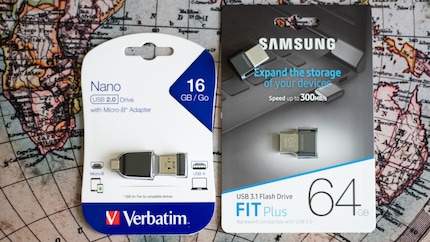
One note before I continue: Unraid isn’t free. Previously, a one-off payment was all it took. In the course of last year, however, Lime Technology switched to a licence model. There’s one exception, as you’ll see in the following list:
This isn’t a reason to abandon Unraid in my eyes. After all, the company behind it also has costs to cover.
The Unraid operating system and its licence are on my USB stick. Moving forward, the system will start from there. Anytime the server launches, the operating system is loaded from the flash drive into the working memory. Configuration changes are also written to the stick. For this reason, the memory stick has to remain permanently inserted.
I purposely chose a stick that’s compact and doesn’t protrude from the housing. This reduces the risk of accidental connection loss when the server is moved. To make the USB stick bootable, I have to prepare it. There are two ways to do this:
I went for option 1, installation this way is simple and requires no special knowledge.
Step 1: downloading and setting up the installer
First, I start my computer and download the latest version of Unraid USB Creator. You can choose between Windows, Mac and Linux. For this specific case, I select the Windows version and install the program. I then plug the USB stick into a free slot on my PC. Time to launch the program.
Step 2: create a bootable USB stick
A start screen opens:
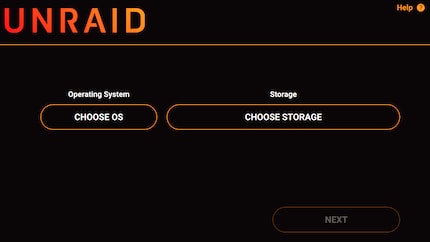
I start on the left-hand side. Here, you have to select the operating system version by clicking on Choose OS. A list of available OS versions will then be displayed:
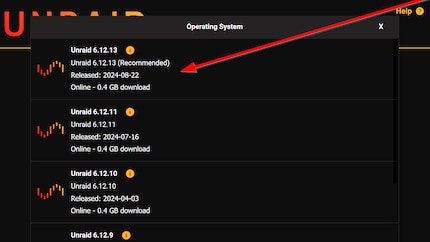
I choose the recommended top version here, which redirects me back to the start screen.
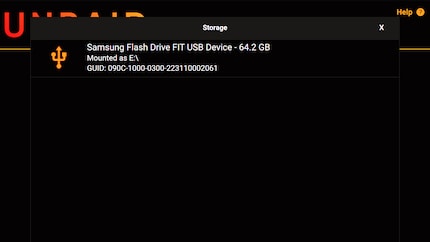
This time, I click on Choose storage on the right-hand side. All inserted USB sticks that have a GUID are listed.
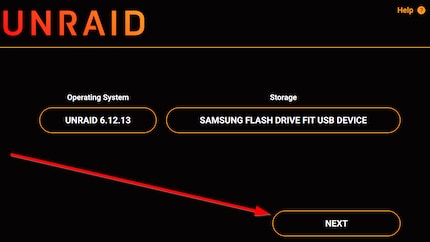
Since I only have one flash drive plugged in, the correct one is displayed immediately. I simply click on it and return to the start screen.

I’m ready to move on and click Next:

I can easily enter my network settings in the next window:
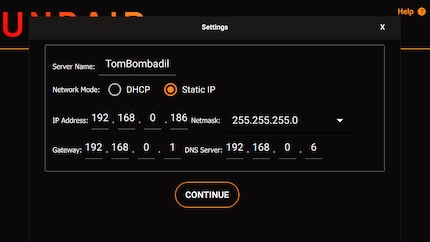
Under Server Name, you enter the name you want to give your server. I go for TomBombadil. For Network Mode, I choose Static IP. This ensures that TomBombadil can always be reached at the same IP address. Under IP Address, you enter your static IP address and select the correct Netmask. It’s worth checking your router to see whether the desired IP address is already being used by another device in the network. You can find numerous tutorials for this online. I make a note of the static IP address – I’ll need it later to access the server via a web browser.
Moving on, I enter the IP address of my router under Gateway and the IP address of our Pi-hole under DNS Server. Alternatively, you can also enter the Google DNS server or other known DNS servers, for example.
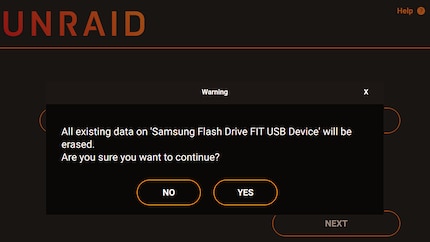
After entering all the settings, I click on Continue. At this point, I’m informed that all data on the USB stick will be deleted. I confirm this by clicking Yes. Make sure you don’t use the USB stick that contains photos from your last holiday!
The bootable USB stick, which now contains the Unraid operating system, is ready. From start to finish, this takes a few minutes. As soon as the process is done, a message will appear indicating whether it worked or not.
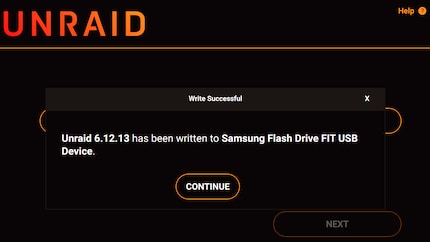
The USB stick is now ready, with my chosen operating system on board. I remove it from the USB port on my computer. Creating the bootable flash drive went flawlessly. Thanks to the installer, I was guided through the process step by step. And it only took me a few minutes.
Next, I turn to TomBombadil. According to Unraid instructions, I have to make the following adjustments in the UEFI here:
Depending on the manufacturer, these settings can be found elsewhere in the UEFI. To boot my future NAS into the UEFI, I mash the F2 key. Again, the specific key depends on the manufacturer. When I’m in, I make the adjustments listed above. Finally, I press F10, confirming and saving the changes. I’ve now successfully prepared the main board for running Unraid. I switch off the server.
Note: if you get stuck, Unraid has its own well-maintained documentation – usually. However, the documentation is currently being revised. Still, the Quick install guide is always available. Otherwise, I recommend perusing the Unraid forum for general problems. You can also ask questions there and will quickly receive a competent answer.
After a short break, I march on and restart TomBombadil. As mentioned above, I previously set the USB stick as the primary boot drive. After the start sequence, I’m shown the selection menu below:
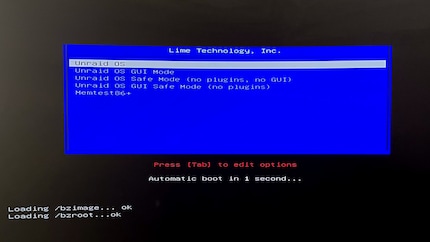
Unraid’s boot menu offers me four options:
Unraid OS (headless): the default boot mode for Unraid Server OS. So-called headless mode uses less memory than GUI mode. However, it requires the use of another computer to access the web interface for administration.
Unraid OS GUI Mode (desktop): desktop mode loads a desktop interface with a quick start menu for accessing the web-based user interface. This UI also contains the product documentation and other useful items. If you don’t have another computer available, it’s your best choice. To use this mode, you’ll need a graphics card.
Unraid OS Safe Mode (headless): use this boot mode to check whether plugins are causing problems on your server.
Memtest86+: if you suspect a faulty RAM module in your system, Memtest86+ can help test for it.
Despite the built-in graphics card, I select standard boot mode for my Unraid Server OS. The start-up process goes quickly. At the end, the IP address I entered when preparing the USB stick is displayed on the monitor.
I remove the HDMI cable from the server and switch to the Displayport input source on the monitor. My computer and monitor are now connected via a Displayport cable.
I then open the Chrome browser, type in the IP address and press Enter. The login window appears immediately. Here, I notice that the server name TomBombadil hasn’t been adopted. Tower is displayed instead, the default server name. No biggie, I’m guessing I can change this later. The first thing I have to do is set a password for the root user:

I choose a strong password, according to the usual rules. Upper and lower case letters, special characters, numbers, 16 characters long. The password goes into my password manager straight away. By the way, I use the Dashlane password manager, Friends & Family version.
After the root password is set, I have to take care of the licence. As mentioned above, the product isn’t free of charge.
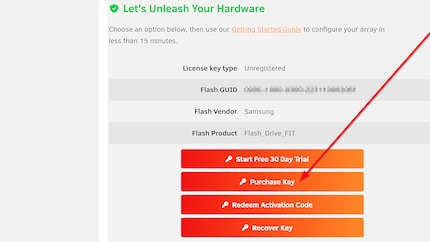
There are several options to choose from here: • Start Free 30 Day Trial • Purchase Key • Redeem Activation Code • Recover Key
Since I’ve already decided on Unraid, I choose to buy a licence. This brings up the view below:
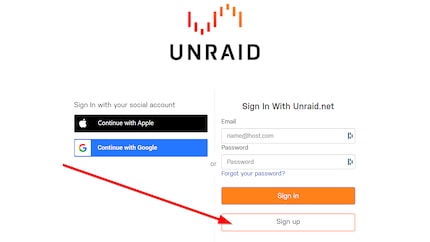
I’m a bit confused at first. I thought I’d have to enter my contact details next. Instead, I’m asked to register with Unraid.net. But since I don’t have an account yet, I choose Sign up.
After registering, I see this message:
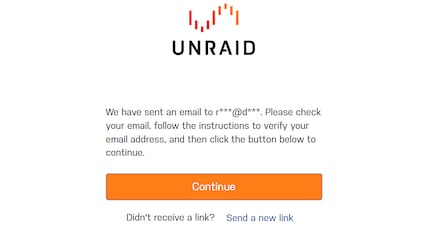
I’m asked to confirm the e-mail address I entered. But when I click on the link in my mailbox, the following error message smiles back at me:
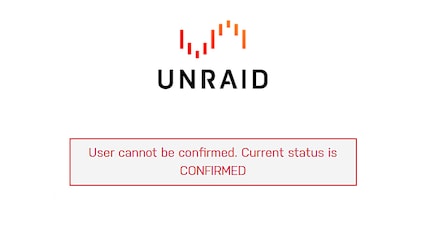
«User cannot be confirmed. Current status is CONFIRMED.» OK, so I created a new user account. But it can’t even be confirmed yet, I’m still suffering through the process. At the same time, I can’t log in to my Unraid user account I just created. After a few failed attempts, the following works. I click on Forgot your password? in Unraid.net and set a new one. Presto, registration works. No idea why registration was such a pain. Pretty annoying if you ask me.
After logging into Unraid.net, I restart the server. I then see the same message as when I first started the system:

I click on Purchase Key again and log into the Unraid.net account I just created.
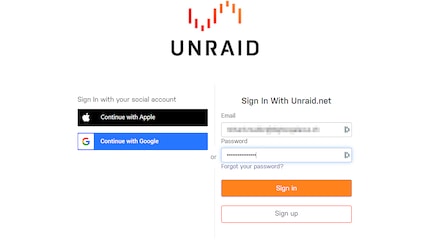
Next, the different licences are displayed. Since I installed more than six hard disks in total, the Starter License is greyed out. I can’t even select it. In the end, I go for the Lifetime License for 249 dollars. This way, I avoid any additional costs for updates in future:
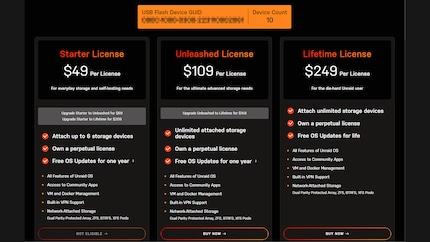
After clicking on Buy Now at the bottom, I’m asked to enter my credit card details. On completing the transaction, I take the opportunity to install my purchased licence key:
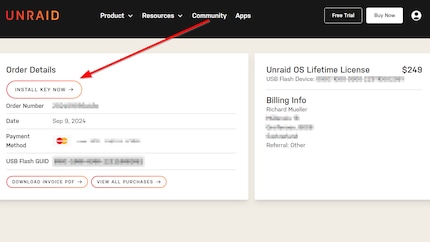
To do this, I click on INSTALL KEY NOW. After a few seconds, a message appears on-screen indicating that the key is now being installed. Shortly after this, another window pops up confirming the key has been successfully installed:
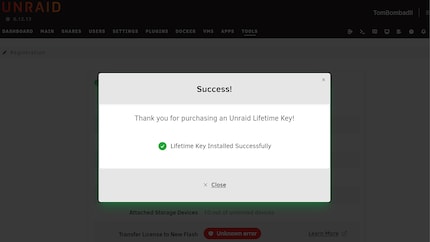
With this, Unraid is installed and the licence is activated. Even though the process is simple, I found it tedious. I didn’t know I had to register an account with Unraid.net. Looking back, I’d first create the USB stick, then make an account on Unraid.net and activate it. After that, I’d buy the licence key. Only then would I insert the USB stick and start the server. I’m convinced the installation process would be a little less bumpy this way.
I was also annoyed by the problems with buying a licence. It made the process unnecessarily cumbersome. I don’t know if it was simply a temporary problem with confirming my e-mail address. If so, I was just in the wrong place at the wrong time. If not, there’s still potential for improvement.
In the next instalment of this series, I’ll look at the basic configuration of TomBombadil. I’ll also tell you which apps I think are important and which I’veinstalled.
I'm a journalist with over 20 years of experience in various positions, mostly in online journalism. The tool I rely on for my work? A laptop – preferably connected to the Internet. In fact, I also enjoy taking apart laptops and PCs, repairing and refitting them. Why? Because it's fun!
Practical solutions for everyday problems with technology, household hacks and much more.
Show all