Raspberry Pi – a gateway drug for do-it-yourselfers
iPhones are great. Android is great. Mac and Windows? Also great. But something’s missing, right? Adventure. When was the last time you actually built something and didn’t just use something? I recently rediscovered the joy of tinkering. And this is my first project with my Raspberry Pi 3: A media server that streams your videos to PCs, smartphones and tablets.
"I’m 100% sure that won’t work", is what Christian Seeholzer said to me. He’s one of two Product Managers in digitec peripherals and a PC component enthusiast in his spare time. So he’s telling me that my project is technologically impossible?
My response: "Challenge accepted!"
At the beginning of the project, I’m not aware of the fact that Seeholzer has hands-on experience with this kind of thing and is deliberately letting me mess up – at least a bit. But even now that this experiment has come to an end, I still do not fully agree with him. But Christian Seeholzer knows what he’s talking about; otherwise, he’d hardly be a Product Manager. In any case, my ambition is sparked. And my idea is really quite simple: I want to connect a Raspberry Pi 3 to my router and connect the former to an external hard drive. Then I want to install Plex to the Pi and connect a Chomescast to my network. Plex is a media server that provides the videos from a local hard drive so that they are streamable on any Apple iOS and Android device as well as on any PC that runs Chrome.
The result: I can watch the videos on my hard drive on my TV. The advantage: no more cable clutter and no more laptops in the living room. All I need now is an Android or Apple iOS device – in other words, a smartphone or tablet. Personally, I don’t like having a computer in the same room when I want to watch a movie. The fans and super-bright screens annoy me.
Sure, I could spend several hundred francs on a streaming box. Or I could invest a few hours of work and build the thing myself. Not only will it save me hard cash, but it’s fun, too. Honest.
The charm of DIY
Come on, it’s totally dumb to spend several hundred francs only to unpack a box and spend a few minutes checking features you’ll never need. Remember Lego? Or Duplo? Playmobil perhaps? Handicraft lessons? Remember that feeling of making something with your own hands? You can relive that feeling. How? Raspberry Pi is the name of this little gem.
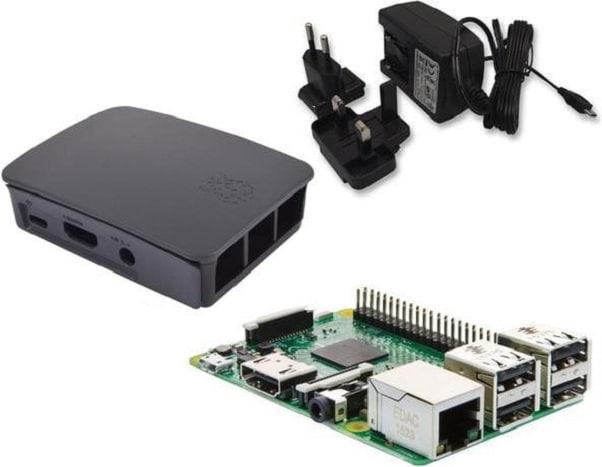
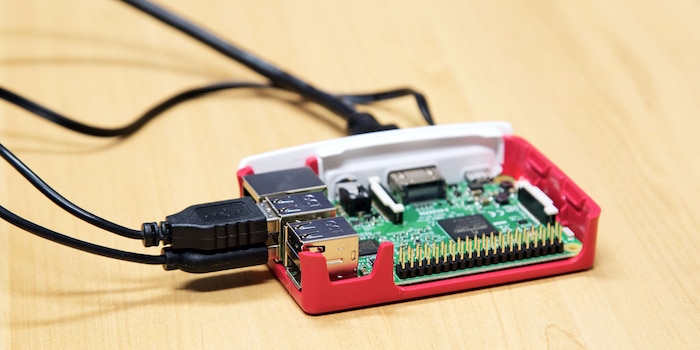
Essentially, a Raspberry Pi is nothing other than a mini-format computer. A Raspberry can do everything a Macbook or your Surface tablet can. All you need to do is teach it how. A Raspberry Pi is equipped with some USB ports, a power adapter that doubles up as a Power Button and an HDMI port. So everything a PC needs.
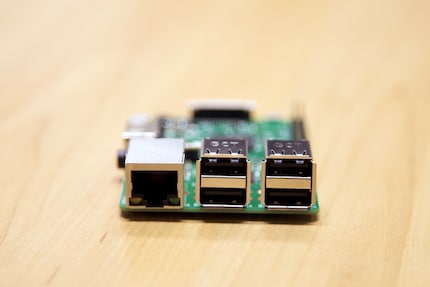
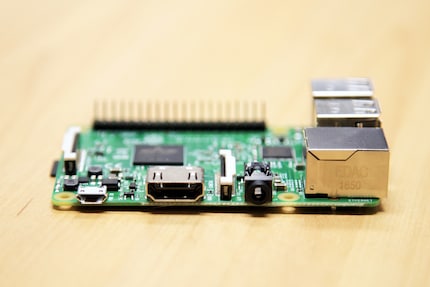
No doubt you’re familiar with these ports. They’re the same ones your PC or Mac has
“To be honest, I’m not really a techie or a computer nerd”, I hear you say. Worry not. It’s not as hard as you might think. All you need to do is read and type. I’ll explain the rest. What we’re going to do is build a media server on a computer that runs nothing.
The level of difficulty for this whole task: Beginner.
- You need to be able to plug in cables
- You need to be able to follow simple instructions for system settings
- You need to be able to re-type lines of text
What you need
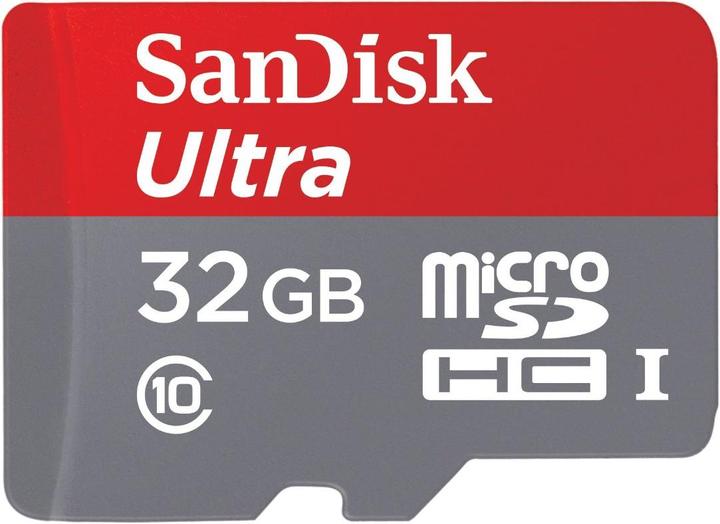
First of all, you need some hardware. When I put together the list below, I just assumed that you have none of the stuff you need for this project at home. So here’s the lot:
Notes on your shopping list.
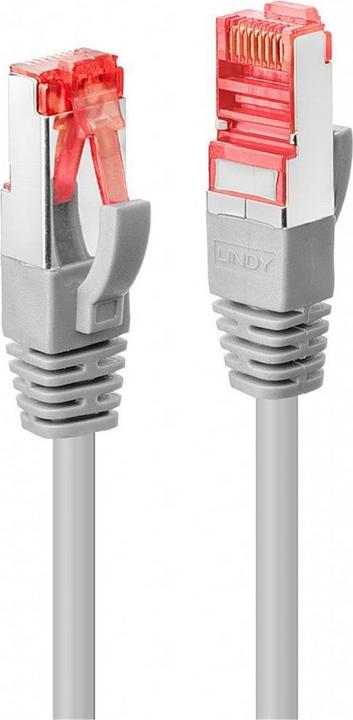
- Make sure the network cable is long enough. In the end, your Raspberry Pi, or RasPi as fans lovingly call it, will be dangling from your router minding its own business. But don’t forget that you will have to connect a screen, a keyboard or a mouse to it when work is in progress.
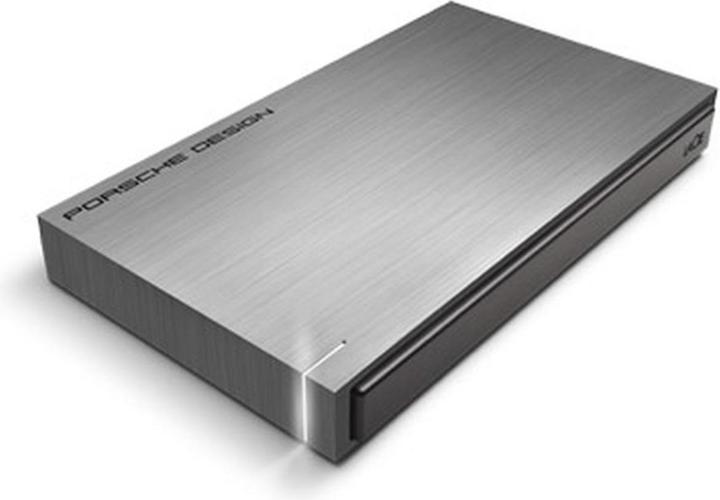
- Any external hard drive under 2TB will do. I’m just a sucker for the Porsche design and LaCie boards – that’s why I chose them. But we have a whole pile of hard drives in our range. Take your pick.
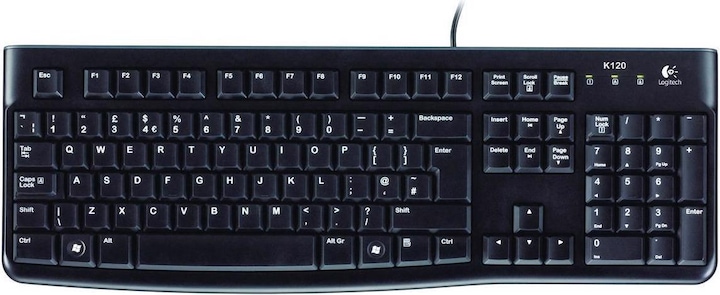
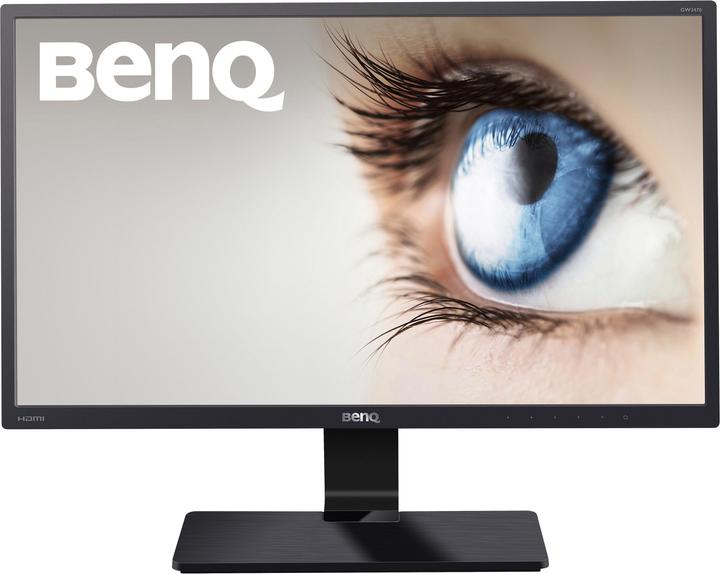
- For the keyboard, mouse and screen, just use the ones from your PC. After all, in the end, the one thing that will be connected to your RasPi: The hard drive.
What you need on the software side:
- Raspbian Jessie with Pixel OS: A Linux version, based on Linux Debian, which is specifically adjusted for Raspberry Pi
- The Plex app for Android or Apple iOS
- A free Plex account
- For Windows Win32DiskImager
- For MacOS Etcher
Preparation: Let’s give that Raspberry an operating system
At the moment, there’s absolutely nothing happening on my Raspberry Pi. And when I say nothing, I mean nothing. Not even DOS or some kind of other “white font on black background”. The reason for this: Nothing’s installed on the Raspberry Pi. That’s why you bought that memory card.
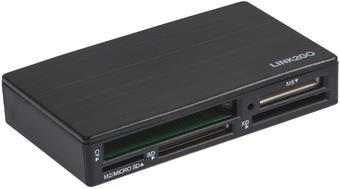
- Connect the card reader to your PC or Mac with the cable
- Stick the memory card into the card reader and wait until your operating system is ready to work with the card
- Unzip the Raspbian zip file
- Tell Etcher or Win32DiskImager that the unzipped .img file needs to be written to the memory card
- Wait until Etcher or Win32DiskImager tell you that the whole operation has ended and then stick the card into your Raspberry Pi. Hook up the mouse, keyboard, external hard drive and the screen and plug the whole bunch of cables into a power socket. The Raspberry Pi will start.
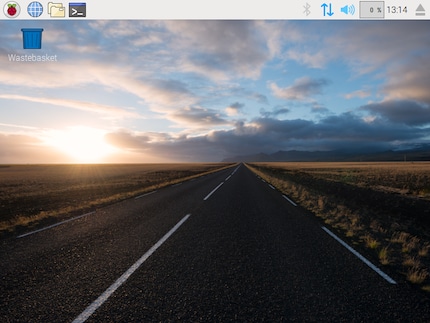
This is what Raspbian looks like. And you taught it.
Right. Done. You just taught your computer how to think. Congrats! But we’re still at the beginning – now things will start to get really interesting.
The set-up
When you remove the keyboard, screen and the mouse from the PC you’re using right now, make sure to print this page off. If you have two screens, leave this page open on one screen and keep the option open to scroll up and down. It’s just important that this page is accessible in some shape or form.
- Connect your hard drive, screen, mouse and keyboard to the Raspberry Pi
- Stick the memory card with Raspbian OS into the memory card slot of the RasPi
- Connect your construction to the power supply. Raspberry Pis don’t have a power button, so they run whenever they’re plugged in.
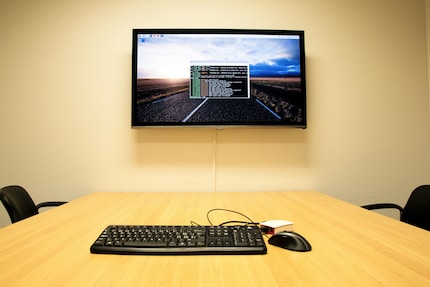
Or use a meeting room as a test lab. That works.
Here we go! Things are about to get cool. Raspbian OS is about to boot! And the hard part is already done. All you’ve got to do now is retype a lot of stuff.
The biggest problem on your desk
There’s one thing worth noting here. When Raspbian boots, it assumes by default that your keyboard has an American layout and looks as follows:

An American keyboard
Swiss keyboards roughly look as shown below, with slight variations in the French and Italian-speaking parts of the country:

A Swiss keyboard
To start with, I didn’t give this much thought, as I’m familiar with the US layout and it only takes me a few seconds to adapt to it. Only Y and Z are always a bit tricky but they’re not relevant for this project. However, the following key is:

The problem child
On the hardware side, we do not have this button. That’s pretty inconvenient considering the fact that we’re going to need that key throughout the rest of the project. Therefore, I highly recommend changing your keyboard layout as soon as Raspbian is running. By the way, this keyboard thing really opens a can of worms. The best way of dealing with it: ignore.
First, we change the keyboard layout.
Keyboard layout for Switzerland
Click on the wee raspberry in the top left corner
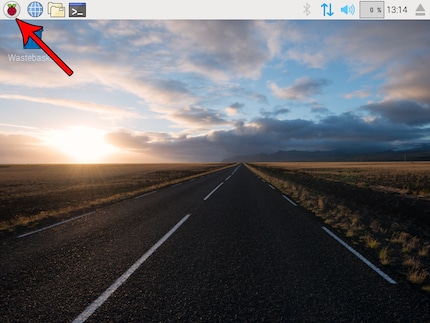
It’s the equivalent of the Windows start button or the apple symbol for Apple
Click on "Preferences"
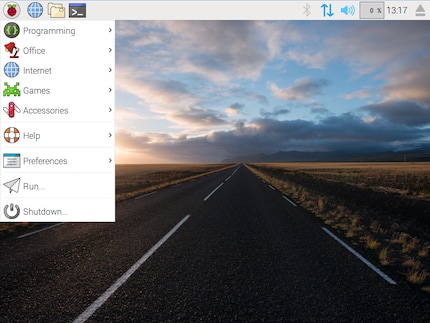
"Preferences"
Click on “Mouse and Keyboard Settings”
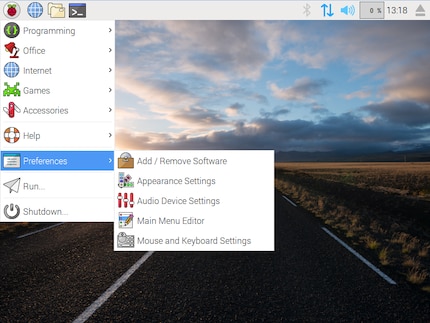
This is where you can change your keyboard settings
Select the “Keyboard” tab
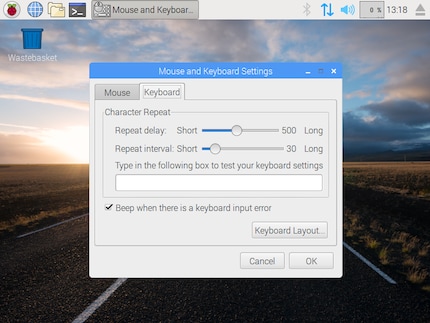
The tab is located at the top of the window
Click on “Keyboard Layout”
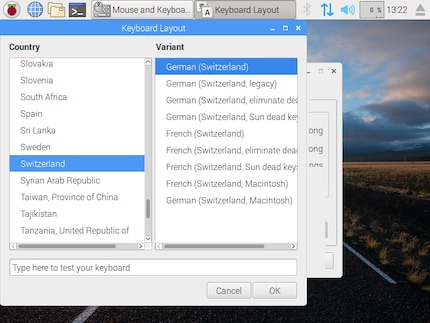
This is where you can change your keyboard layout
Search for Switzerland and select "German (Switzerland)". Click OK until you’re back on the desktop
There seems to be some kind of bug here. Linux fans will always, always tell you that a Linux computer is only truly effective and efficient when used in terminal mode, i.e. a white font on a black background. But for some reason, the keyboard layout is not accepted in that mode. Therefore, you cannot use the above-mentioned key of contention in console mode. That is why we are working with the terminal window in desktop mode. Per se, this makes no difference in terms of use.
Finding updates and upgrades
Raspbian’s equivalent to the Windows start bar is at the top of the screen. Just click on the terminal symbol.
To make sure you’re working with the latest version, briefly run updates on the whole system. To do so, type the following into the terminal:
sudo apt-get update && sudo apt-get upgrade -yIn other words:
- sudo: Stands for "Super User Do", so "Super user, execute the following task”
- apt-get: Stands for “Advanced Packaging Tool Get” and means a tool that independently downloads programmes and features is told to get something
- update and upgrade: Gives your system a checkup, synchronises installed versions with the latest versions in APT and updates the list
It’s really quite simple. Type, enter and wait until you can type again. This may take a few minutes so don’t worry.
Installing the found updates
Now that you have successfully sent your first Linux terminal command to your computer, the latter then said “cool, let’s get things done”, you’ve hopefully recovered from the shock that you’re working neither with things you can click on nor that look like something from a hacker movie shortly before the nuclear reactor blows up.
Your next command:
sudo apt-get update && sudo apt-get dist-upgradeThis is how you perform upgrades. The computer works and you can sit back and watch how code flies over the screen.
HTTPS for more security
Essentially, you’ll be sending data via a network. To make sure this all happens in a safe environment, we will quickly install a feature that allows Raspbian to send and receive data via HTTPS.
sudo apt-get install apt-transport-https -y --force-yes Here, we use a wee additional command called "--force-yes". All it means is that we’re telling Raspbian “Do such and such and, if required, force it to do such and such”.
Your key to download safety
As you have probably noticed, downloads are carried out and installed no questions asked. Safety checks? Nope. To be sure you’re not installing any kind of junk, we are equipping Raspbian with an authentication key.
wget -O - https://dev2day.de/pms/dev2day-pms.gpg.key | sudo apt-key add - By doing so, we are setting up a rule that only allows downloads to be carried out that are signed and verified with a key.
Now this is where the keyboard layout comes into it: We need the so-called pipe symbol, which would theoretically be located directly above the enter button. As we do not have the button, we need to enter it into the line with the shortcut ALTGR+7.
It’s Plex time
Time to install our main feature: Plex. This is done with three commands.
echo "deb https://dev2day.de/pms/ jessie main" | sudo tee /etc/apt/sources.list.d/pms.list This is also a great opportunity to update our update list
sudo apt-get updateAnd now for the main event:
sudo apt-get install -t jessie plexmediaserver -yTo make Raspbian Plex starts in the background, we must reboot the Raspberry Pi.
sudo rebootIP configuration
Open the terminal window. We will be accessing the Plex server via our home network. Therefore, we need to know where exactly the server is located in our network. To find out, we will give the Raspberry Pi a static IP.
hostname -I This gives us the laptop’s IP. Mine is 192.168.1.56. Your number probably also starts with 192.168.1. followed by another number. Write this number down on a notepad. During the course of this project, I will be using 192.168.1.56.
Now, we will store this IP in the computer configuration. This requires us to open a text file in the terminal window and type something into it.
sudo nano /boot/cmdline.txtA window should open in which you can type stuff. Admittedly, it’s not very pretty but we won’t be using it very much. There is only one line in the file. At the end of the line, you need to enter the following.
ip=192.168.1.56Please note: Your IP doesn’t necessarily end in 56. It’s the number you scribbled down on your notepad.
- Save the file by pressing CTRL+O
- Close the text editor with CTRL+X
To make this change permanent, you need to reboot Raspberry Pi.
sudo rebootPlex function test
If you’ve got everything right so far, you’ll be over the moon in about two seconds. That’s because it is now time to find out if we can access our server.
Open the web browser on your regular PC. The address is:
192.168.1.56:32400/webThis is where you can set up your Plex account by following the instructions on your screen. But there is still one problem: The external hard drive we’ve connected to the Raspberry Pi is not yet in use. We will change that now.
Back to the Raspberry Pi.
Mounting the hard drive
When the terminal window is open, you can just carry on where you left off. If not, simply open it again. The command is:
dmesgA lot of text will fly over your screen. Look for your hard drive in the tangle of words. You may have to scroll up a bit, to where the USB connections appear. That’s where you should find your hard drive.
We will now create a folder on our Raspberry Pi by saving a link on our hard drive. The command is:
mkdir /mnt/library- mkdir: "Make Directory"
- /mnt/library: This is the link to your new folder
Now you need to define the link in a text editor.
sudo nano /etc/fstabLinux is clever when it comes to USB drives. They are generally marked with “sda” followed by a number starting with 1. So without much fuss we can safely say that our hard drive is sda1. How come? Because we’ve connected no other drive.
In the text editor, we have to assign sda1 to the library folder. Simply enter the following line above the first line that starts with a #:
/dev/sda1 /mnt/library vfat defaults,nofail 0 0 Try to keep the spacing as similar as possible to the lines you can see above.
- Save the file with CTRL+O
- Close the file with CTRL+X
To activate it all, you need to reboot your Raspberry Pi. At this stage you should be familiar with the required command.
sudo rebootDrive function test
After rebooting the RasPi, restart your terminal window and check if you can access the drive.
cd /mnt/libraryIf you’ve got everything right so far, you should see the hard drive and not receive any error messages or the like. If there is data on your drive, you can display it with the following command.
lsIf your drive is still empty, you won’t see anything. To be able to load something to the drive, we will now share the file with all users so they can freely interact with the device. By default, the drive is blocked for anyone who is not sudo.
sudo chmod 777 -R /mnt/libraryRight, done. You can now unplug your screen, keyboard and mouse and put away the Raspberry Pi – the latter you will only need to pay attention to if you need it directly. From now on, the device will run autonomously. If you need to transfer data, you can do that from another computer.
Loading data to the hard drive
There are two ways to load data from your PC to the Raspberry Pi. Essentially, we’ve built a server that indexes all data on a hard drive and serves that data to a client. You could now either disconnect your hard drive, transfer movies and then reconnect your hard drive each time but that would be a bit nuts. Alternatively, you can use your FTP client to send data to your data carrier and to the index for the client. Sounds complicated but really isn’t.
Tools like WinSCP or Filezilla require an initial setup before they can be used for transferring files. Let me explain this by means of WinSCP.
- Download WinSCP
- Install and open
- A registration window will open when your first start up
You need the following settings:
- Transfer protocol: SFTP
- Computer name: 192.168.1.56
- Port number: 22
- User name: pi
- Password: raspberry
Click on save and then on register. Navigate to the index /mnt/library and you will find the external hard drive. Send data to your server with drag ‘n’ drop.
Limitations
Now you can access any device that interacts with your Plex server via your mobile. This includes Chromecasts and therefore also your TV. So I’ll just let Christian Seeholzer keep banging on about how my idea was doomed; safe in the knowledge that I’m watching movies and series on my TV that are stored on my RasPi.

This is what Plex looks like on Android. Awesome, right?
But my victory is soon dampened. During the first function tests, I observed that my Raspberry Pi is brought to its knees when I attempt to stream a 1080 video file. 720 is fine but 1080 is a catastrophe.
Maybe that’s what Christian Seeholzer meant? Could it be that the Raspberry Pi falters when it has to convert 1080p? After all, according to my rough calculation, it can easily handle the data throughput. I haven’t asked him yet and there is one reason for that: I’m gripped by DIY fever. I’m sure I can achieve more and better things with my RasPi. Or with other devices. In any case, I’m not done yet. I’m looking for bottlenecks in the setup. Is it the USB2 port? Is it the Pi’s processor? Maybe both? What else? I’m back in scientist, inventor and tinkerer mode. I’m just trying out a lot and sometimes messing things up in the process. But I’m having fun.
And you can too. Now that you’ve installed the Plex server, you can apply your knowledge to other projects. Create your own file server to access your home from anywhere. You could build an e-mail server. You can be more than just a user. Be an inventor!
Enjoy!
Journalist. Author. Hacker. A storyteller searching for boundaries, secrets and taboos – putting the world to paper. Not because I can but because I can’t not.
From the latest iPhone to the return of 80s fashion. The editorial team will help you make sense of it all.
Show all