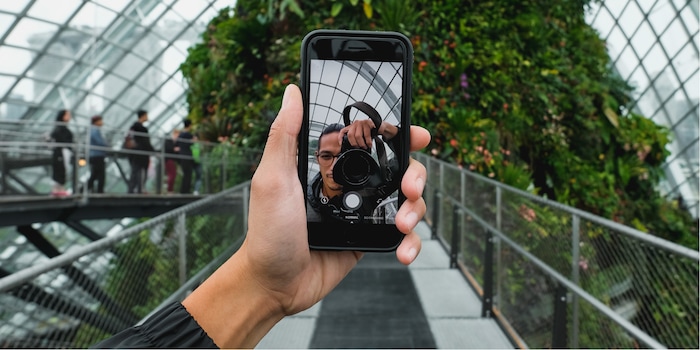
What makes a good photograph?
Everyone knows it’s not a question of whether you have a good camera; it’s if you’re a good photographer. But what does that even mean? Here are a few tips to help you get started.
You’re likely to encounter the same issue with cameras as you do with PCs and smartphones. No sooner have you bought one, there is a newer, better one on the market that makes your device look outdated. However, there’s no point getting worked up about it. Not just because it won’t change anything, but also because it’s not the big problem it appears to be. Your camera, just like your PC, can still do most things you need it to.
These days, a mobile phone camera obviously isn’t good enough to snap a photograph for a ten metre-large billboard. Funnily enough, that’s exactly what Apple is suggesting they have done in their current iPhone advert, and I actually believe them. Let’s face it, you’re much further away from a placard when you’re looking at it than you are a 10 x 15 cm image. This means the pixel density can be a lot lower.

Photographed by David L on a Samsung Galaxy. The photo quality probably wouldn’t be much better on a professional camera, and anyway, that would be completely missing the joke.
GAS (Gear Acquisition Syndrome)
Although a mobile phone camera can usually do everything you need it to, most tech nerds suffer from Gear Acquisition Syndrome (GAS). That translates into constantly compulsive buying new equipment despite already having adequate devices. GAS sufferers are plagued by thoughts such as these: «If I could just shoot at ISO 102,800 I’d get a real breakthrough» and «I’d finally be able to take macro shots with this lens.» But then once they’ve bought the equipment, they aren’t able to do those things. So of course, they have to buy some more...
The problem is, the more time you spend with cameras, the more you end up attaching greater importance to certain technical aspects than they actually have. You run the risk of getting more caught up in the camera specs than in taking photos.
Focus on what’s important
If you’re not happy with your photos, the solution isn’t to buy a new camera, but to learn how to take better photographs. But what does that mean in practice, and do you go about doing it? It goes without saying that there are plenty of YouTube channels and other online tutorials where you can teach yourself. However, I think there is one crucial step that all the others naturally follow on from: changing the focus of your interest. Get engrossed in photographs and their effect rather than the tools you use to take the photos. Hopefully that gives you some food for thought.
Think about what makes a good photograph
What marks a good photo out from a bad one? There are different ways of answering this question. For instance, a tech nerd might define a good photograph as an image that is sharp in the right places, is neither over- nor underexposed, has a high resolution, rich colours, a neutral white balance and no perceptible image noise. These are all aspects that rely on you using the equipment properly. But a good image is much more than that.
A good photo fascinates people, draws them in, triggers emotions or tells a story. As you can see, none of these things have anything to do with technical quality. They are all about effect. Even if it’s not the case that every image has the same effect on every person, there are general principles to follow. To a certain extent, these let you learn how to take photos that make an impact.
Image composition
When it comes to image composition, there are so many aspects and guidelines to bear in mind. In fact, there are almost too many to begin with. Here are a few pointers to get you going:
The golden ratio and the rule of thirds: Don’t always place the main subject of the photograph in the middle.
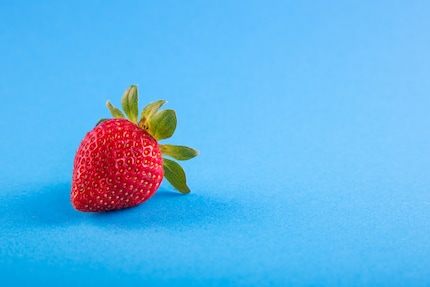
Format and lines: Square, panorama or portrait? Portrait is more dynamic but more unsettled, which makes it problematic on a 16:9 screen or in a video. The respective lines have a similar effect. Vertical lines signal proximity or an obstacle, while horizontal lines give a feeling of spatial dimension and are quieter.

Perspective: What does the shot look like vertically from above or below? Do you want to make someone look big or small?
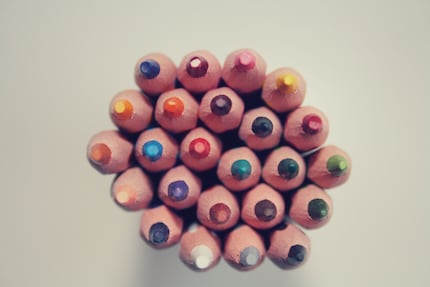
Composition priorities: Busy over empty, left over right, light over dark, sharp over blurry, and so on.
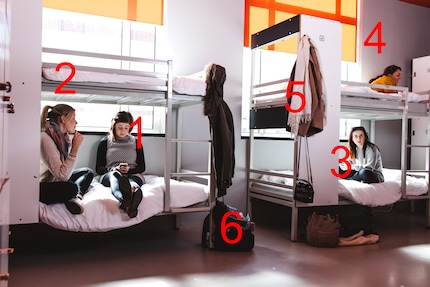
Symmetry: Aesthetically, it has a calming, «nice» effect, but it can often seem a bit boring or undynamic.
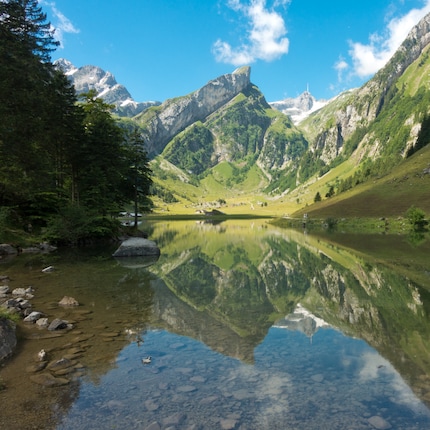
Patterns: Create clarity in a photograph, even if that isn’t the main subject. [[image:8522589]]
Colours: Warm colours, cold colours and contrasts

Those are a few areas for you to focus on. To start with, just concentrate on one of them. The important thing is that you want to create something. A lot of people snap photos any which way and don’t care about composition as long as the subject is in there somewhere.
On the whole, it’s quite easy to implement ideas about image composition. It’s usually only a matter of bending down or getting a few steps closer. The reason why people don’t do this is they don’t think of it. Let me explain with three examples of photographs taken on a short walk near our office.
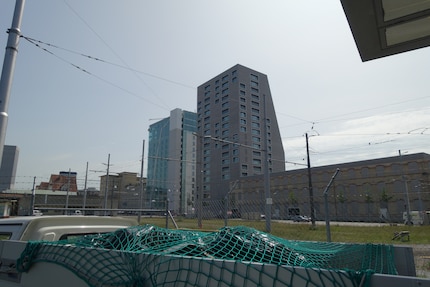
Bad: This is a really bad photograph. (I’m allowed to say that because I took it.) The foreground and cables are distracting, and the field of view seems random. You get these kinds of photos when something catches your eye (in this case the tower block and wall diagonal to each other) and think you have to record it but you don’t give it much thought.
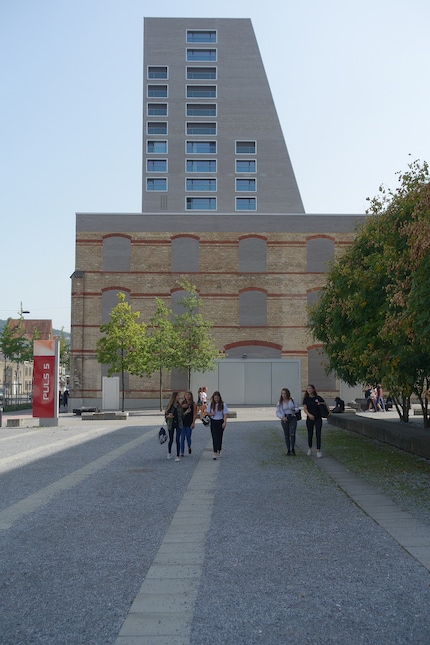
Better: This is a photograph of the same building taken a few steps on. You see clear lines, symmetry and clear perspective. The foreground also features corresponding geometric lines.

Bad: River landscapes always look good. But the problem is this photograph doesn’t have a main subject or visual resting point for your eyes to fix on.

Better: The eye is better directed when you take the photo through the peephole with the improved view of the river.
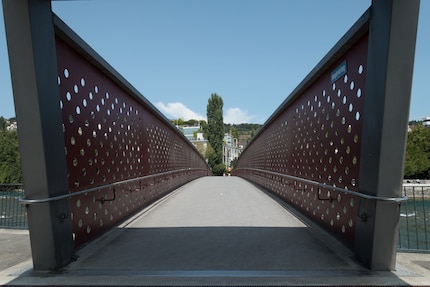
Average: You can still see the workings of a design idea here. It would have been better if the idea had been implemented more systematically.
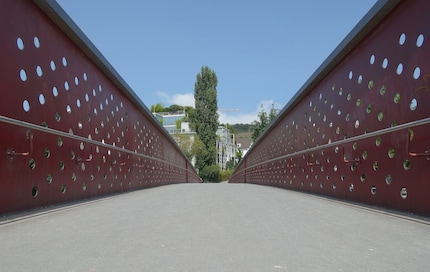
Clearer: I took two steps forward and snapped another photo. This time there are no distorted shapes, no shadows on the ground, no people on the bridge. I removed anything that didn’t tie in with the theme of perspective.
Photos should have an element of surprise, which is why composition rules can sometimes be broken. However, there is a difference between not knowing a rule and intentionally breaking it.
Light conditions
You can’t click your fingers and expect to get glowing sunsets. In fact, you can only really create light conditions when you’re in the studio. What you can do, though, is be more aware of them and learn how to use them to your advantage.
Our brains are trained to ignore light conditions. For example, we have to be able to recognise a face even when half of it is in cast in shadows and the other half is bathed in sunlight. Our brains just filter away the shade to the extent we don’t even notice it any more. Similarly, we are oblivious to the fact houses turn a yellowish colour in the evening sun, as we’re focussed on getting home. In photography, we have to learn to see like a camera or like a baby that only recognises shapes and colours without allocating them to objects. Don’t worry, it’s just a matter of practice. When you’re starting out, it helps to follow these simple rules: avoid harsh light; opt for half-light. Always look to see where the light is coming from and avoid contre-jour. Watch out for shadows and reflections.
Preparation and arrangement
Getting ready for taking photographs involves asking yourself simple but nevertheless essential questions such as:
- Is the battery fully charged?
- Is there enough space on the memory card?
- Is the camera properly configured for the shoot so that I can get started straight away?
- If it’s an elaborate shoot, do I have replacement batteries, memory cards and even a replacement camera?
The preparation stage also means arranging the shot. That can be a lot of work in itself, so start out small. Maybe you just need to tidy the table and wipe it down before you photograph something. Surprising as it may seem, many people don’t think that’s necessary. The next step is to implement all the rules you’ve learnt about image composition.
Emotions
Visualising emotions is probably the most difficult part of photography. A photograph can’t be considered moving based on just the image. It also depends on the person looking at the photo. As a photographer, you want to be understood by as many people as possible, but at the same time, you don’t want your work to be kitsch. That’s why it’s a good idea to avoid tired, crude and excessively bold imagery.
It’s possible to display emotions indirectly – in other words, without using people in your photographs. Instead, you can show the result of an emotion. For instance, discarded or destroyed items imply anger, sadness or confusion.

If feelings are to be read directly from a face or from posture (and transmitted to the viewer), you as the photographer have to be able to capture the right mood. You can’t let this be destroyed by your presence. In fact, the photographer should even be able to draw out the mood. Many people don’t agree with staging photos so they look real. But, if you’ve ever seen a professional at work, you’ll know they never leave anything to chance. What sets the pros apart is you don’t notice any staging in the photographs themselves. The photographer knows exactly what facial expression and posture they’re looking for. If they’re working with experienced models, they can just give instructions. In all other situations, the photographer needs to map out the story and context of the shot for the person in front of the camera. This should let them get into character and, with any luck, adopt the right facial expression and posture of their own accord.
Learning how to implement an idea in practice
I was initially going to mention this at the start of the article, as a basic understanding of your camera is a prerequisite for everything that follows. It also helps GAS sufferers get to know their cameras and then decide on that basis if they really need a new one.
But in the end, I felt it was important to emphasise that the starting point for a good photograph isn’t your camera; it’s how you imagine the result. You first have to know what kind of image you want to create. Once you have that clear in your mind, you can work out the tech side of things. In fact, that is the easiest bit – you can even read about it in the manual.
Let me give you an example. Say you want to photograph a street at night. You want the glow from the street lights to appear as glittering rays. To be able to do that, you have to know that it will only work when the aperture is closed. And you’ll need a tripod to take night shots with a closed aperture. That’s when the little GAS monster whispers in your ear «But if you bought that new camera that shoots up to ISO 102,800 ISO, you wouldn’t need a tripod.» Shut up, GAS monster. Buying a new camera just so you don’t have to set up a tripod is ridiculous. I mean, what would happen if people walked by who aren’t supposed to be recognisable. Then you’d still need longer exposure and a tripod.
A lot of cameras, including single-lens reflex cameras, are very complex. It took me years to work out what all the buttons on my first camera did. That’s why I can’t go into details about how yours works. But what I can do is give you a few tips on what you should be finding out about:
- What the four camera modes P, A, S and M mean (on Canon cameras they’re called P, Av, Tv and M)
- How to adjust autofocus to the situation, especially the focus points
- How to adjust the lighting and in particular, what the difference is between spot metering and matrix metering. There are many websites, even explanatory videos, that give information on these points so you can do your research. You’ll also find answers in your camera’s manual, which for some unknown reason, no one reads.
If you want, you can photograph in automatic mode. Modern automatic is reliable and provides good results in most situations. But you should also know the other options so you can choose which mode to use. The main advantage of shooting in auto mode is you can concentrate on the subject rather the camera.
Should you take a leaf out of the professional’s book?
If taking a good photograph isn’t reliant on having a top-of-the-range camera, why do professional photographers have such expensive equipment and so much of it? Karl Taylor, who talks about gear nerds in this video, has a pretty good idea why. Professional photographers need to be able to deliver within short time frames, as they work to deadlines. The kind of equipment they use lets them be more efficient. In other words, it’s more a question of quantity than quality. You can create amazing photos on all kinds of camera (when you know what you’re doing); it will just take a bit longer.
Given everything involved in a professional photoshoot, from models to stylists, travel time to location hire and obtaining permits, the camera is a fairly small part of the overall cost. Once all that time, effort and money has been invested, photographers can’t have their cameras giving up the ghost at a crucial moment. That’s why they need a robust, reliable one for work – or better still, two cameras.
I get the impression that most professional photographers don’t give the tech sides of things too much thought. The camera just has to work and be able to snap photos on cue.
Video tip: In thePro Photographer, Cheap Camera series, a professional photographer is given a cheap camera and has to capture a good shot with it. You can tell from the video that a big part of their job has nothing to do with the camera itself. Some of them had their work cut out for them, as they had to use «cameras» like these:

Chase Jarvis had the dutiful task of taking snaps with a LEGO camera

Lara Jade didn’t want to know what was in store for her
Guess what?
While I was working on this article I may… just may… have bought a new camera. I’ve still not managed to take a good photo on it, but I’m relieved to know it can capture eight images per second at ISO 51,200 if I ever wanted to. Now I just need a subject for sport shots, and then… maybe I’ll need another camera.
My interest in IT and writing landed me in tech journalism early on (2000). I want to know how we can use technology without being used. Outside of the office, I’m a keen musician who makes up for lacking talent with excessive enthusiasm.
Interesting facts about products, behind-the-scenes looks at manufacturers and deep-dives on interesting people.
Show all