
Background information
A home-made keyboard: my masterpiece is ready
by Kevin Hofer

Lubing: the most important keyboard modification out there. I hadn't realised its potential. Until I tried it myself, of course: I love it!
A little over two years ago I built my first DIY keyboard. Along the way, I made several serious mistakes. The biggest one: switches. I installed Clicky Switches. Keys that provide tactile and audible feedback when pressed. And while I'm still a fan, I don't consider them useful in DIY applications. Why? Because you can't lubricate them. Otherwise they lose their characteristic «click». However, since DIY is all about modding, they aren't suitable for such a project in my eyes. Lubricated switches just feel and sound awesome (article in German).
I therefore decided to disassemble my 75 per cent keyboard and slam new switches onto the PCB – along with other mods. This, of course, means it's time to unsolder 84 switches. A tedious, yet somehow satisfying job. I like being focused and brooding over something while forgetting everything around me. A good trait when it comes to lubing switches, as will be seen later.
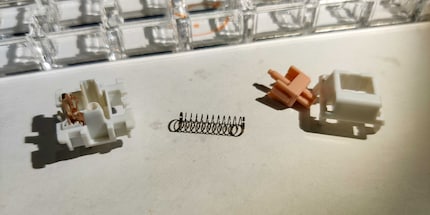
As a Clicky fan, I want to install tactile switches, i.e. ones with haptic feedback when triggered. This way I can at least feel when the switches are triggered. In the end, I went with Immoral Pandas. In essence, it's a knockoff of Drop's Holy Panda Switches. They're actually called Feker Holy Pandas. But since knockoffs are immoral, they're usually referred to as Immoral Pandas in the mech keyboard community. Slightly unethical of me, I know, but I've been participating in quite a few Group Buys for keyboards lately and have consequently strained my budget badly. 90 original Holy Pandas cost $105. With the knockoff, I get 110 pieces for just shy of 40 dollars. According to a review by Squashy Boy, they really aren't that bad. In any case, better than Cherry MX Browns, the least tactile "tactile" switches in the world.
Lubing usually requires a bit of effort. I have to open each switch individually and apply the lubricant. When it comes to the lubricant itself, I chose G-Lube from Glorious. All readily available at digitec/Galaxus. I also needed a fine brush to apply the lube, a screwdriver to open the switches, and self-clamping tweezers to hold the small parts.
When lubing, there are different approaches to how much material to apply and where. Everyone has their own technique, including me. I first opened the switches with a 2-slot screwdriver and separated individual parts of the key. I set aside the top part of the housing, as I didn't apply any lubricant there. For the lower part and the stem, I treated myself to a lube station and inserted the individual parts accordingly. That way I didn't have to hold them with tweezers. I put the feathers in a separate container. The lower part of the housing, the stem and the spring are all covered.
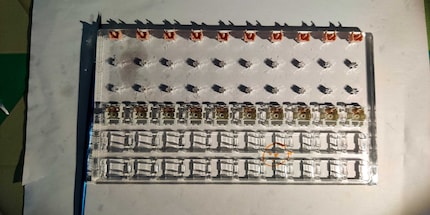
I applied little lubricant. The way I do it, only small globs of lubricant should be visible, ideally none at all. For the lower part of the housing, I applied lube to any sides where the stem is guided, as well as around the spring retainer and the base.
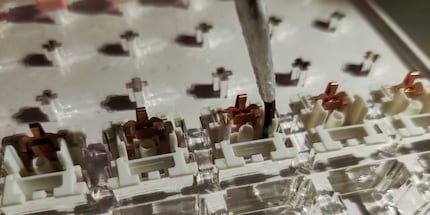
For the feather, I first ran the brush all the way around. Then I distributed the agent among the interstices, and last but not least, the top and bottom within received a layer.
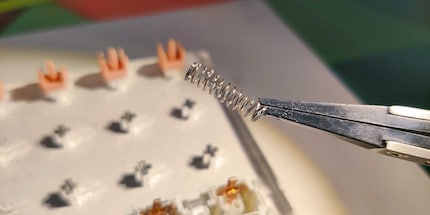
With the stem, I didn't lubricate the feet that create the haptic feedback. The switches could lose some of their tactile features otherwise. Which I want to avoid, as otherwise I'm left with quasi-linear switches. I might as well install Cherry MX Browns. They're meant to be tactile, but the haptic feedback is hardly there. So I lubed the sides and the spring guide, as well as the above inner part.
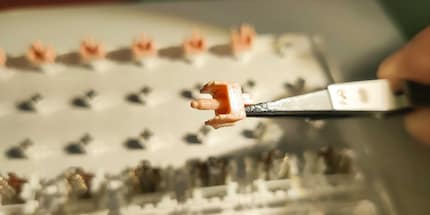
After that, I put the switches back together. Now they're ready for use. The whole process took about three hours for around 90 keys. An exercise in patience, but as with soldering, I can lose myself in the process and switch off completely. There's almost something meditative about it.
To help you understand how different the switches sound, I placed a lubricated and unlubricated switch on the lube station and filmed it. Since I don't have a professional microphone, the difference doesn't seem so evident. Nevertheless, it's noteworthy. The so-called spring ping, i.e. the noise that a spring makes when it jumps apart, is no longer audible. The treated switch produces a fuller, richer sound. Heavenly! More importantly, however: the Immoral Pandas no longer feel scratchy. There's no sign of friction. The rod is slick with lube – hehe. As it should be. Just one keystroke feels downright magical. When pressing down the unlubricated switch, I clearly feel the friction, and the keystroke doesn't feel like one fluid motion.
Lubricated switches completely dominate the scratchy feel and high-pitched ping of unlubricated buttons. Every switch should be lubricated, period. It's all buttery smooth. The full sound when pushed down completely is more satisfying than a beer on a hot summer day. Once you've pressed a gelled switch, you won't want to go back.
In addition, lubing just feels very reassuring. It's kind of like tech nerd meditation. I was totally relaxed afterwards. Which motivates me to keep going. Fortunately, I still have a couple of Zealio v2 Switches for my Ikki 68 Aurora build. However, I'll lay off the G-Lube and use Krytox 205g0 instead. Joy all around!
Now I've weeded out the first serious mistake I made with my 75 per cent DIY keyboard. I still have to solder the switches to the PCB. However, I have committed other transgressions. I'll reveal them very soon.
From big data to big brother, Cyborgs to Sci-Fi. All aspects of technology and society fascinate me.
Interesting facts about products, behind-the-scenes looks at manufacturers and deep-dives on interesting people.
Show all