Guide
How to make easy DIY candles
by Natalie Hemengül

On TikTok the «glass painting» trend has already got over 797 million views and is especially liked within the anime community. I gave it a try and quickly realised: looks simple, but it’s not.
The gyms are closed, and with that goes my time-consuming hobby. In search of a new pastime, the algorithm of TikTok – a social media app I’ve been spending most of my screen time on since last March – led me to #AnimeTok. A hashtag under which anime-related content is shared. Among them are numerous DIY projects such as «glass painting».
In glass painting, as the name suggests, you paint on glass instead of a canvas. But it doesn’t stop there, you also have to paint reversed and from the back. Sounds complicated, but seems quite simple on TikTok thanks to a tracing technique. Unlike usual, with tracing, you don’t see what your finished work looks like until the end, after you’ve turned the glass over.
So it’s just right for a painting beginner like me – at least that’s what I thought. I know now after my self-experiment: you don’t need talent, but you do need knowledge.
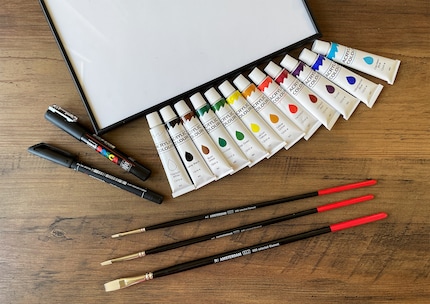
Attention, a lot of material is required:
Step 1 – select image
Find a picture template. Of course, any subject is possible. However, as an anime fan, my decision was obvious: Sailor Moon. Paste the image into a blank slide of a PowerPoint presentation and adjust the slide size to the size of your glass plate. After that, you mirror the image so that the final result is the right way around. As a beginner, it’s best to start with a simple image. In words: little colour, fewer shadows and fewer highlights. Once you’ve developed a feel for it, you can move on to more complex images.
Step 2 – placing the template
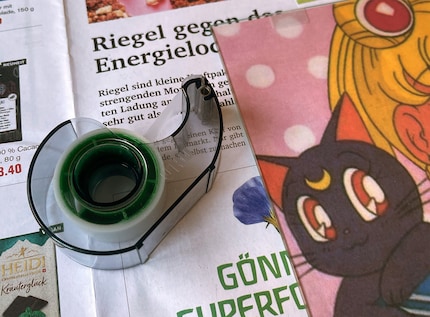
Print the PowerPoint slide in colour and original size. Cut the image and glue it to the back of the glass using the adhesive strip. Make sure that the tape doesn’t cover any areas that you want to paint over later.
Step 3 – outlines
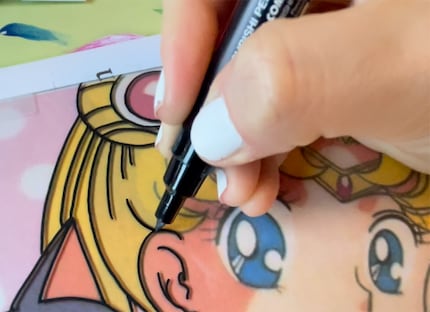
Just like tracing, transfer all the outlines with a black marker to the glass plate. It’s important that the black marker is opaque. When in doubt, draw over the same line twice. Let the outlines dry for at least 30 minutes. At best, several hours. To fasten things up, you can use the cold air function of your hair dryer. Keep a minimum distance of about 20 centimetres.
Step 4 – layering acrylic paints
With glass painting, you’re drawing backwards. Start with small areas, such as highlights and shadows in eyes, clothes, hair and skin. It’s important that you have enough paint on the brush, because you’re not working with strokes, but with dabbing movements. Try to not touch the outline of the marker at all. Once you've applied the highlights and shadows, let them dry for at least two hours and then you can move on to the larger areas and layer them on top. You should never dilute the acrylic paint. The thicker it is, the easier it’s to layer the individual colours. Fresh paint mistakes can be cleaned using cotton swabs or pads.
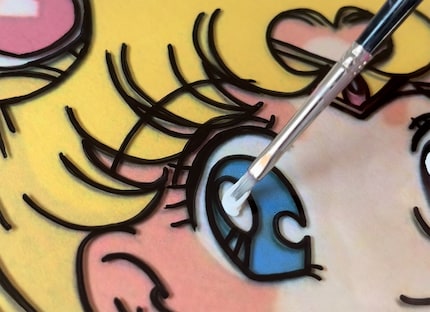
**Step 5 – check colour opacity **
While painting, check for empty spots and colour opacity by holding the glass against a light source. If light is still shining through in certain places, touch up the area by applying the same colour. For this purpose, you don’t need to remove the entire template. It’s enough to partially detach the template from the glass and check the areas individually. To avoid having to remix the colour every time you want to touch up, I recommend that you take a careful look at your work before each colour change.
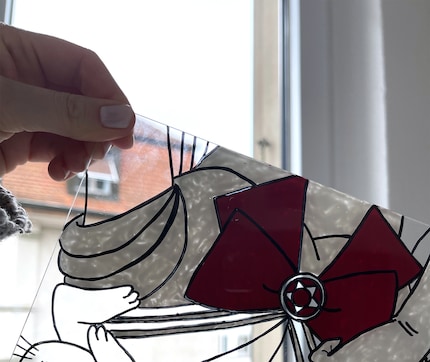
Step 6 – final touches and glass cleaning
When the glass painting is completely dry, you can use a toothpick to scrape away paint drops outside the outlines if they stretch into an area that should be unpainted. Then remove the adhered template and clean the front side of the glass and the free areas of the back side with window cleaner. No fingerprints, dust nor dirt should remain.
Step 7 – frame, place, enjoy
Put the glass back into the picture frame. If you don’t want to use a white sheet of paper to cover the blank spaces in the image, you can also use a matching manga cutout or a printed background.
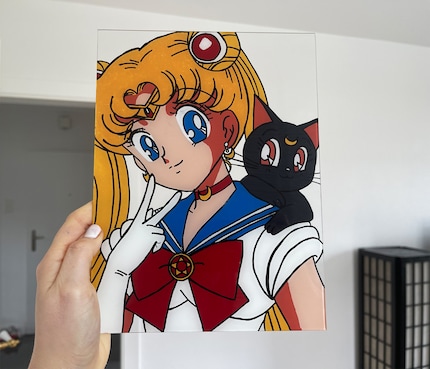
Your glass painting is ready!
Glass painting is a time-consuming hobby because you always have to let the individual layers dry first. Ideally overnight. Otherwise you risk unsightly cracks in the paint. To help you make progress anyway, I recommend starting several paintings at a time and progressing with two to three colours per painting each day. Also, before you start, consider whether you will be painting with your right or left hand. If you're right-handed, start your painting movement from left to right. If you’re lefthanded, start the other way around. This will prevent you from accidentally smudging the already applied colour with your hand. If your painting is beyond saving, you can reuse the glass by scraping the paint off the glass with an old toothbrush and some dish soap. And if glass is too delicate for you, Plexiglas is a shatterproof alternative.
Now you know everything I wish I had known before my first attempt. Have fun testing this new trend!
Here you'll find my TikTok video trying this art style.
Staying up to date with trends on TikTok, Instagram, Twitter or Facebook is what I do. Anything involving Japan, dogs and weight training are my thing.
Practical solutions for everyday problems with technology, household hacks and much more.
Show all