Guide
Quick photo tip: Use the histogram!
by David Lee

With photos in raw format, you can easily correct parts of the image that are too dark and too light. The principle is very simple, but you shouldn't overdo it.
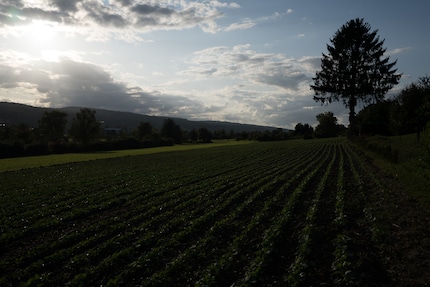
Cameras are less able to cope with differences in brightness than the human eye. As a result, they depict shadow areas almost completely black and the sky or reflective surfaces too bright. Especially in bright sunlight and backlighting, the intermediate levels are missing and the image has far too much contrast.

There are various tricks to compensate for and correct this. One of them is to take photos in the camera's raw data format or in DNG format. These formats store significantly more differences in brightness than JPEG, which makes image editing more flexible.
Today, every camera can save raw data. Many smartphones can too, although the standardised DNG format is usually used here. On my smartphone (Huawei P20 Lite), I can't select DNG manually, but photos are saved in this format as soon as I select the "HDR" option.
Now you just need to know how to post-process the images.
The principle is very simple and the same in all image editing: you lighten the shadows and darken the highlights. The relevant sliders in Adobe Photoshop Lightroom are called "Depths" and "Highlights" and can be found in the basic settings. In Photoshop, you can access these settings via the menu command "Filter -> Camera Raw Filter". In Google Photos, you will find the "Shadows" and "Highlights" sliders under "Brightness". Sometimes the (highlights) are also called "Highlights".
Shadows and highlights should not be confused with black and white. These sliders have a different function, which I'll come to in a moment.
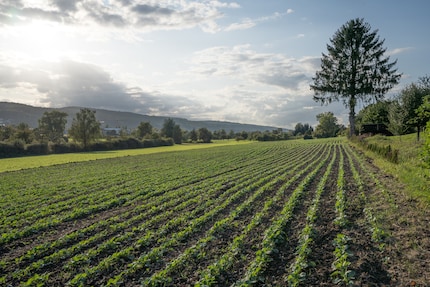
I first turn up the Depth slider in Lightroom. Often a lot, here I have set it to maximum to emphasise the effect. If the areas are still too dark, I also increase the exposure. This makes the image brighter overall. When adjusting the exposure, however, you have to make sure that there are no overexposed areas.

Lightroom - or Camera Raw in Photoshop - shows you overexposed and underexposed areas if you hold down the Alt key while moving the slider. Alternatively, you can click on the top right or left of the histogram to display warnings for borderline exposed areas in red.
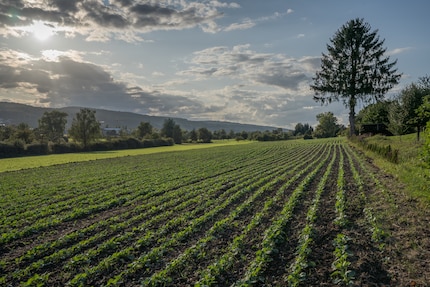
Then I lower the highlights. This restores colour and structure to almost white areas in the sky. Here, too, I have applied the effect to the maximum for clarity.

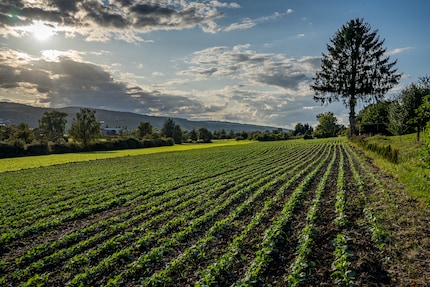
Balancing the light and shadow makes the image somewhat dull and low-contrast. A simple countermeasure would be to increase the contrast. However, I prefer to use the "Black" slider instead and also increase the "White" value if necessary. This has a similar effect, but I can also influence the light-dark mix.
Lightroom offers further settings to make the image clearer and crisper. They are located directly below the brightness controls in the "Presence" area. In this image, I have increased all values except saturation slightly, but nowhere more than 28 per cent.

I wouldn't recommend always setting the sliders to maximum. Too much processing can have undesirable side effects. For example, over-brightening the shadows can increase the image noise. If you remove the noise, the image loses detail as an undesirable side effect.
This is why it is important to expose the photo as correctly as possible. Be sure to check the histogram in difficult lighting conditions. And if in doubt, turn the exposure compensation down slightly, as underexposure is better to correct than overexposure.
My interest in IT and writing landed me in tech journalism early on (2000). I want to know how we can use technology without being used. Outside of the office, I’m a keen musician who makes up for lacking talent with excessive enthusiasm.
Practical solutions for everyday problems with technology, household hacks and much more.
Show all