
The old one has had its day, a new one is needed - my home-made PC!

Admittedly, my previous box is still running smoothly. But with all the innovations such as DDR4 for RAM, Skylake for processors and the 10-series for graphics cards, as a passionate PC hobbyist I almost felt compelled to switch and upgrade.
Foreword
Updating individual components of the old gamer PC was never an option for me, it was just too daft. I had to have a completely new rig and - as is unfortunately often the case with me - preferably yesterday. This is also the main reason why I couldn't take more or better pictures of the whole creation process - it all happened far too quickly. By the way: My faithful companion in numerous battles will not be sent to a retirement home or even the scrapyard, but will be allowed to experience a second spring as a reconditioned and refurbished war veteran, together with a new owner.
Have mercy, please
A quick disclaimer up front: I am not an ambitious hardcore overclocker, professional gaming enthusiast or superhuman component expert. Nevertheless, I am familiar with the individual parts of a PC and their functions and have already assembled one or two computers (which are still working perfectly to this day). So please be a little more lenient than usual with your comments... and if not, that's okay - I'm a big boy, I can handle it and I know how to defend myself. And, most importantly, if you have any valuable tips and tricks for building your own PC, please let me know - I soak up knowledge like Spongebob!
Order, wait and freak out
Okay, all the packages have found their way to their destination on time and undamaged - thank you digitec, for the outstanding availability at the time of ordering and the "ordered by 5pm today, delivered tomorrow" and "free Saturday delivery" services. Right at the start, I checked all the packaging for possible damage and correct contents. I checked the graphics card in particular two or three times, as I had recently heard of a case in which a disappointed gamer found a 980Ti in the packaging of a 1070... fail! To be honest, the parcel orgy felt like a birthday and an early Christmas combined. An almost indescribable experience: "You're a dreamer, you!"
Organisation is half the battle
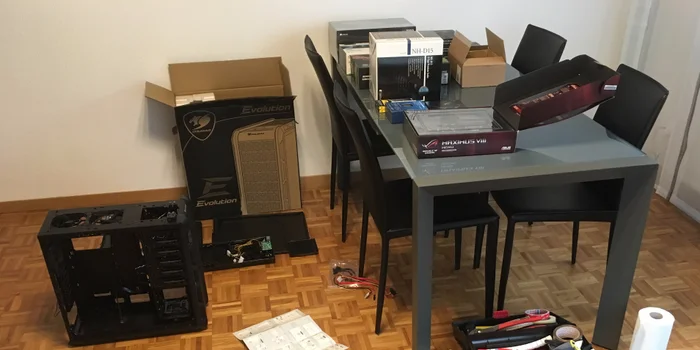
I always choose the largest and best-lit room in my realm for the assembly. I'm well aware that this sounds like I have a twelve-room villa with a swimming pool and double garage. Who knows that's not the case? Joking aside, in my opinion, the size of the room is extremely important so that all components are placed next to each other and no damage can occur due to parts being stacked on top of each other. The lighting should also not be underestimated, especially when installing the components in the housing. I also always have a plastic bowl ready for screws and other small parts, look for the right screwdrivers and always have some household paper to hand for sticky, sweaty hands or hands soiled by thermal paste. Finally, an antistatic pad is also necessary to prevent the precious and damn expensive individual parts from being sent to the eternal hunting grounds by power surges before commissioning.
I have a plan: off to the box
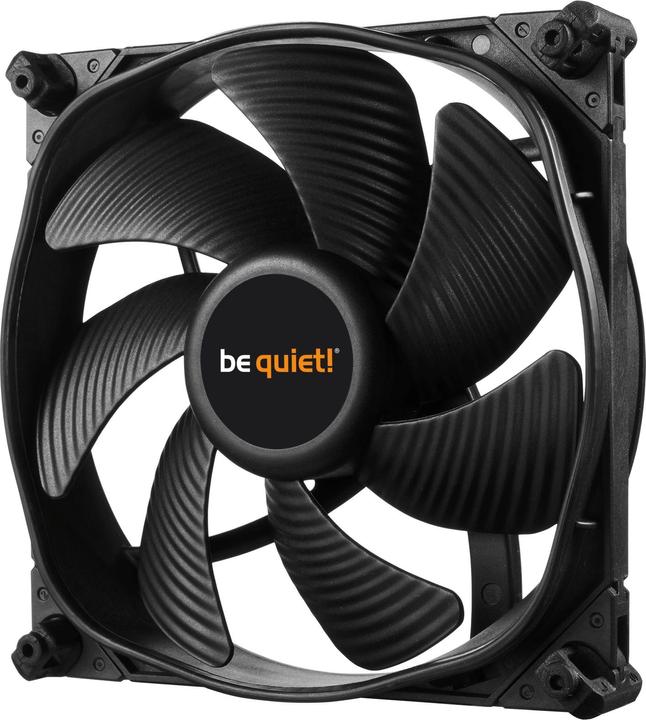
I then think about how I want to proceed. Of course, there are certain steps that can hardly be carried out in any other order - for example, who puts thermal paste on the processor after screwing in the CPU fan? Logically an absolute no-go. On the other hand, there are no instructions that have to be followed: Freedom for all! As I opted for a case with seven fan slots this time, it would be a shame to leave even one of them empty. Right at the start, I therefore gave my Cougar Evolution case a 1A air conditioning system. Admittedly, the case doesn't win any beauty awards in my eyes, but the functionality and value for money are unbeatable. The inner values count. I installed five 120mm and two 140mm be quiet SilentWings 3 fans - I gave the two pre-installed Cougar fans a chance, but replaced them after initial tests as they were clearly too loud compared to the optional fans. Finally, I would like to mention here that I have not yet ventured into a complete water cooling system (or even an all-in-one variant)... but, as the saying goes: what is not, can still be.
The nucleus
The fans are mounted, their cables, together with those of the front connections such as USB and audio, are routed through the recesses provided behind the housing wall and the case is put aside for the time being. I then take care of the mainboard, the processor including the CPU cooler and the RAM bars. First unpack the mainboard and place it on the antistatic base, insert the four RAM bars (as my CPU cooler is a monster), then the processor, apply thermal paste (I hate you, thermal paste), fit the CPU cooler and the control centre, the heart and soul, is ready. Placing the whole thing in the case turned out to be a bigger hurdle than expected, as the space above the CPU cooler became quite tight with the additional built-in fans (which turned out to be a daring exercise in finger acrobatics, especially when connecting the power to the mainboard). Spoiler alert: In the end, everything fitted. The Cougar Evolution offers plenty of space for cables behind the motherboard mount, which surprised me in a positive way. Nevertheless, the interior could still be made a little more spacious - cooler giants and Pascal graphics cards thank you.
More power
In the next step, I placed the power supply unit, a BluRay drive and the SSD, which could have been done before the motherboard was installed (I didn't do it simply because I was afraid of space around the motherboard). As I like to listen to my music on my 7.1 surround sound system connected to the PC, I treated myself to a sound card, which I installed immediately after the graphics card. In combination with the mainboard, the graphics card sparkles and lights up in 16.8 million possible colours - this is not necessary for me personally and is therefore not actively used. I briefly played around with the disco effects after the installation... all well and good, but as I said, completely irrelevant for me. Finally, of course, you must not forget to connect all components to the power supply and, if necessary, to the mainboard. Then comes the all-important startup test - I always feel like I'm jumping into the water for the first time: either I resurface or that's it... go hard or go home.
Quiet, powerful and simply awesome
And lo and behold: once again, everything worked right away (not that I've ever built a PC that didn't work straight away - but I still struggle with these insurmountable anxiety levels with every project). A quick update of the BIOS and the device boots from the Windows 10 USB stick and installs the operating system. One Office installation, numerous drivers, downloads and hundreds of updates later, it's done: "My precious!" And I'm beaming from ear to ear! In idle mode, the thing with the be quiet fans is actually not audible at all: I haven't been able to run any intensive long-term benchmarks yet, but even my first attempts with "The Rise of the Tomb Raider" and "The Division" on a 27-inch screen with QHD resolution left the CPU and graphics card cold. Just in time, cooler temperatures and darker days are also snowing into the house... and I'm ready. Ready for mobster battles and world war battles that are second to none.
You might also be interested in this


When I'm not stuffing my face with sweets, you'll catch me running around in the gym hall. I’m a passionate floorball player and coach. On rainy days, I tinker with my homebuilt PCs, robots or other gadgets. Music is always my trusted companion. I also enjoy tackling hilly terrain on my road bike and criss-crossing the country on my cross-country skis.
From the latest iPhone to the return of 80s fashion. The editorial team will help you make sense of it all.
Show all


